I know y'all have seen these flowers before, usually on a headband or necklace or even bunched together on a wreath. This time, I decided to try to make a large one to put on this denim bag. I'm usually not one to gaudy things up too much, but I'd had this bad laying around forever and decided it either needed to change or go {My husband got it as end of the year gift from the PTA at his previous school...it had that school's logo embroidered on it, so I took that out a few years ago. Gym teachers & coaches aren't usually known to carry cute little denim embroidered bags...ha. : ) }
The supplies I used for this project included the bag, scrap fabric { I had a scarf that never seemed to look right with anything that went into my fabric bin, but you could use old t-shirts or any fabric that you can cut into strips}, and my hot glue gun. I just bought the cheapo one at Hobby Lobby for like $4 and it has lasted me almost 5 years.
Start with a tab of fabric in the middle and glue it down. Then wrap it around so that the end of that tab is covered, gluing along the way. Usually when I make these flowers, I glue only parts of it, but I glued most of this one down since I figured it would get used a bit harder.
I just wrapped it tightly and twisted my fabric strip as I went. If your strip doesn't make one whole flower, you can just add a new strip as you twist the flower and it will seamlessly tie in.
Continue to glue and twist until you get the desired size. On this flower, I just used up the length of the scarf. And here's the finished product....
I spent $0 and less than 10 minutes....and I've already had to settle a fight between my girls over it. I'd say that's a good sign it turned out all right. ;)
Showing posts with label DIY. Show all posts
Tuesday, May 31, 2011
Thursday, April 14, 2011
Chandy makeover
Does anybody else have this in their house? It seems like almost every other house I'm in has this same "brass beauty"...when we first moved in, I knew I had to take matters into my own hands to rid our house of it. This may have been when my love of spray paint first happened. I came across this hammered textured spray paint {I think I just picked mine up at Wal-Mart for about $5} and I love the texture it adds to the metal.
I just took the bulbs out and taped everything I didn't want painted. I left it hanging up there and just put a drop cloth under me and used a piece of paper behind where I was painting to catch the rest. And yes, my hands were black by the end. ; )
And the results....
I just took the bulbs out and taped everything I didn't want painted. I left it hanging up there and just put a drop cloth under me and used a piece of paper behind where I was painting to catch the rest. And yes, my hands were black by the end. ; )
And the results....
Since this room is about to be redone this chandelier may be getting another makeover {maybe gray??}, but for right now, I'm loving the tranformation that just a can of spray paint {yet again} has did not only to this light fixture, but the entire room.
This is one of those ideas that could be used in so many different ways and if you don't have a "brass beauty", they are on Craig's List and at yard sales all the time. It would be cute painted white or light pink with some crystals hung from it for a girl's room. Or you could even do a fun color to add a splash of color and whimsy to any room. A black one would also look great in a teen's room with some black/white zebra print or with a bold brocade print.
Anybody else have one of these "brass beauties" they need a quick fix for?
Friday, April 8, 2011
A trip out of the 70's
I've had one of those weeks where I've had to finish a whole lot of projects...you know, those ones that you ALMOST finish and then don't get around to actually finishing and it sits there till you put all the supplies away and totally forget about it....maybe I'm the only that does that. : ) Anyway, one of my projects this week was to hang these mirrors that one of best friends so kindly gave me {you know who you are!}.
So, one of the drawbacks of living in an old house {even though y'all know my LOVE for older homes} is the funky designs that you find that usually reflect the period when it was built. Sometimes it is cool and helps make the house unique...not so in this case. Our house has lots of great built-ins, but it has these lattice window things in between the master bed and bath.
I don't love them, but it's one of those things, I've learned to deal with because I'm not sure the amount of work to fix it would be worth it. So, I came up with a compromise....I unscrewed the back of the mirror hangers and then screwed it back in with some ribbon in it and then hung it up over the lattice.
I may revamp it a bit, but I think it atleast takes away some of the cool 70's lattice look.
So, one of the drawbacks of living in an old house {even though y'all know my LOVE for older homes} is the funky designs that you find that usually reflect the period when it was built. Sometimes it is cool and helps make the house unique...not so in this case. Our house has lots of great built-ins, but it has these lattice window things in between the master bed and bath.
![]() |
| you can check out the only wallpaper left in the house in the bathroom...it's about half off |
I don't love them, but it's one of those things, I've learned to deal with because I'm not sure the amount of work to fix it would be worth it. So, I came up with a compromise....I unscrewed the back of the mirror hangers and then screwed it back in with some ribbon in it and then hung it up over the lattice.
| sorry for the fuzzy pic |
I may revamp it a bit, but I think it atleast takes away some of the cool 70's lattice look.
I know it still would look better with a a new sheet of drywall, but I think I'm liking this new look that took almost no effort pretty good. SOOOO...what's your verdict?? Cheesy trying to cover it up or a step in the right direction?
Oh and guess what?? It's another Friday night at home alone (with the kids, of course)...I'm thinking my husband would be surprised to NOT find something painted or redone by the time he gets home, don't you? : ) I'll let you know what I get ahold of....
Thursday, February 24, 2011
Anthro letters
I love letters as wall art...especially Anthropolgie style.
But at $18 a pop, it wasn't in the budget. Sooo...I figured out a way to get the look I want for a fraction of the cost. Sure, the real thing is probably better, but I'm so excited with how this project turned out!
I saw a way online to make wood like like metal, so instead of using wood I headed to Hobby Lobby and bought 3 3D cardboard letters at $2.47 each. (I'm sure they'll go 50% off next week, but I was already there for something else so I picked them up : ))

I ALWAYS have black spray paint on hand, and I did....but only enough to get me this far...

So I went to my craft paint box (which is full due to all the school projects we've done over the last few years!) and luckily I had some black. I finished them off with that.

This only took a few minutes to dry. Then, I had some silver craft paint that I rubbed on with a paper towel.

So easy and so quick. This project took me less than 30 minutes and less than $10.
I may go back with another coat of my "zinc" and give them a shinier look...not sure yet. What do you think?
![]() |
| Anthropologie's Zinc Letters |
I saw a way online to make wood like like metal, so instead of using wood I headed to Hobby Lobby and bought 3 3D cardboard letters at $2.47 each. (I'm sure they'll go 50% off next week, but I was already there for something else so I picked them up : ))

I ALWAYS have black spray paint on hand, and I did....but only enough to get me this far...

So I went to my craft paint box (which is full due to all the school projects we've done over the last few years!) and luckily I had some black. I finished them off with that.

This only took a few minutes to dry. Then, I had some silver craft paint that I rubbed on with a paper towel.

So easy and so quick. This project took me less than 30 minutes and less than $10.
![]() |
| original idea for the letters |
![]() |
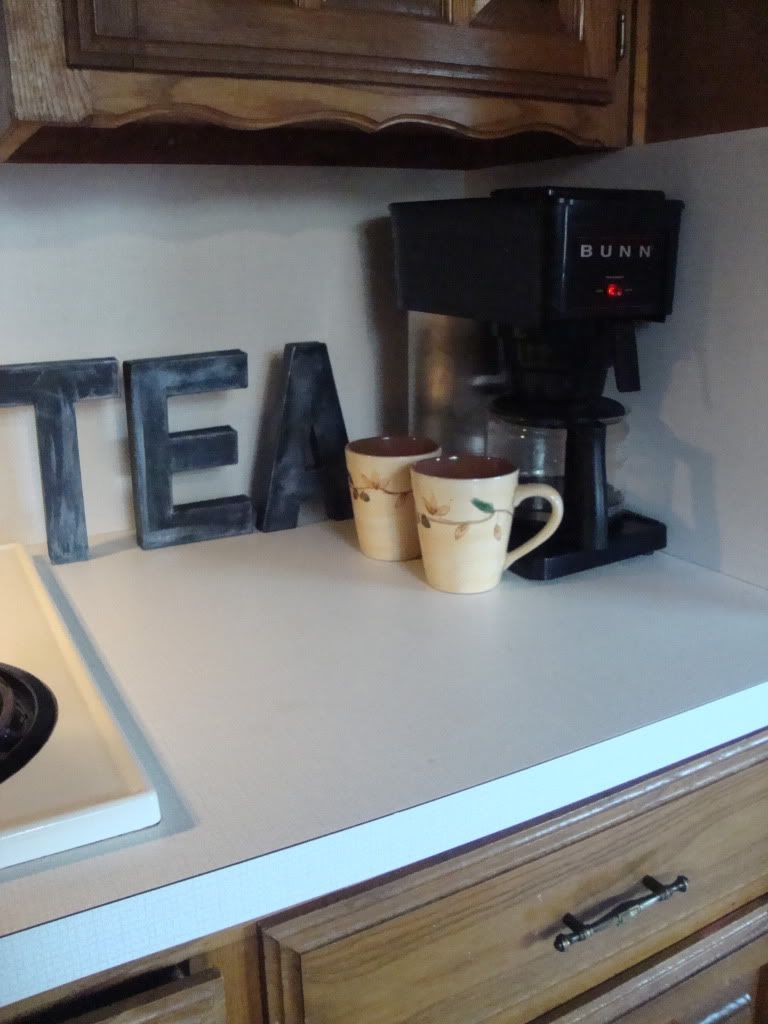
| another option...since some days i live on tea and coffee |
![]() | |
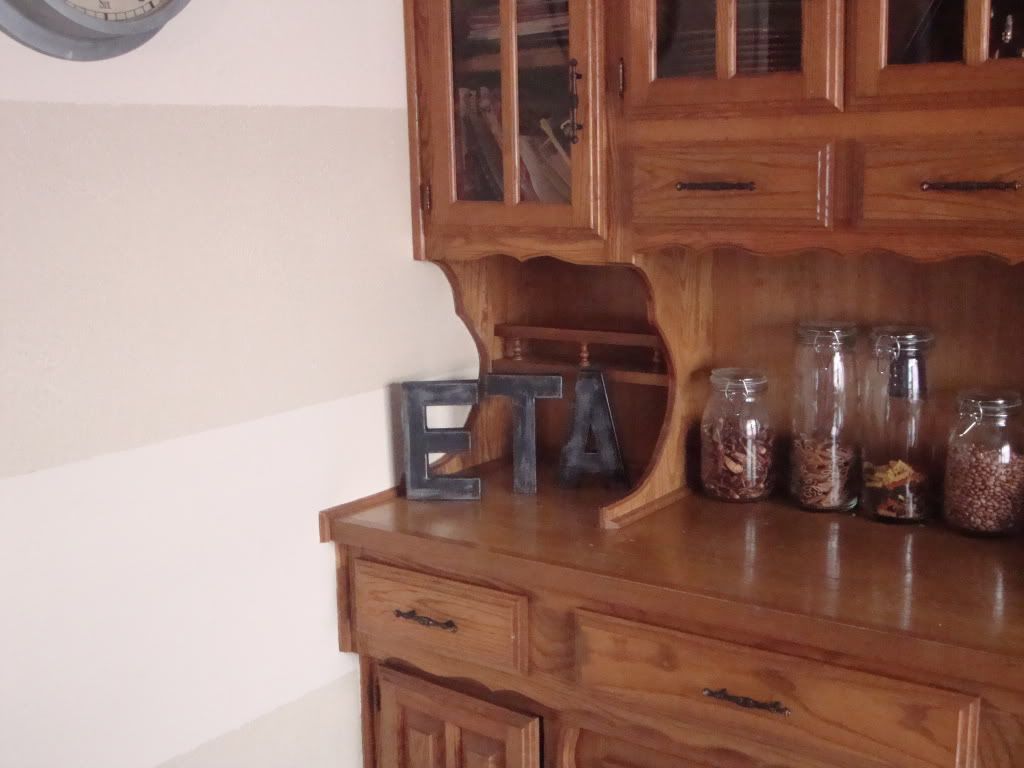
| this one's for that point in the day when I'm wondering what daddy's ETA will be : ) |
I may go back with another coat of my "zinc" and give them a shinier look...not sure yet. What do you think?
Saturday, February 12, 2011
Just another Friday night...
My sweet husband ended up being gone for the night, so what's a girl to do when she's home alone with 4 kids on a Friday night? Why paint her kitchen, of course!
My kitchen hasn't been featured on here yet...I've done quite a bit of work in there, but nothing to write home about, but I'm so excited about the mini-transformation I did tonight. Originally, it had some precious country blue wallpaper & wainscoting to match the cabinets. All signs of the 80's have been stripped away, but it has been pretty basic tan (one of 3 tans from the same family I've used all over the house.)


Since, for right now, I'm keeping the cabinets as is, I need to keep the paint on the lighter side to not make the room feel like it's caving in on me while I'm cooking. I decided to step it up a notch, by adding some stripes using that same family of colors (lucky for me, I have extra of all those colors on hand, so this was an almost free project!)
How to:
Hope you enjoy!
My kitchen hasn't been featured on here yet...I've done quite a bit of work in there, but nothing to write home about, but I'm so excited about the mini-transformation I did tonight. Originally, it had some precious country blue wallpaper & wainscoting to match the cabinets. All signs of the 80's have been stripped away, but it has been pretty basic tan (one of 3 tans from the same family I've used all over the house.)


Since, for right now, I'm keeping the cabinets as is, I need to keep the paint on the lighter side to not make the room feel like it's caving in on me while I'm cooking. I decided to step it up a notch, by adding some stripes using that same family of colors (lucky for me, I have extra of all those colors on hand, so this was an almost free project!)
How to:
- measured the entire wall and divided by 5...I knew I wanted large stripes which would be 3 of the original wall color and 2 to paint
- measured out all around the room and marked off with a pencil
- connected pencil lines with Frog tape
- checked and reapplied tape in a few areas...overall this method worked really well!
- took an almost dry PURDY brush and blotted all the edges with paint and then filled in (you could roll it, but I didn't feel like dirtying another thing to clean : ))
- immediately took off tape when finished
- touched up a couple areas


Hope you enjoy!
Thursday, February 10, 2011
Bathroom Remodel

after
before
This is our kids' bathroom and it was one of the last rooms to be touched in our house...probably because once I got around to it, I was so sick of stripping wallpaper. But one morning this fall, Trey and the kids headed off to school and I decided to tackle it (oh and I sorta forgot to mention this to him ; )).
What was done :
- spray-painted gold mirror black
- sanded, primed, and painted the cabinets black (I already had the paint from another project)
- stripped the wallpaper, textured and painted walls (already had paint and texture)
- hit Ikea for cheap knobs/pulls ($1.99/6 pack of knobs)
- already had the tile (bought extra accidentally for our other bath - Score!)
- spent $100 to install tile (would've figured it out myself, but I was having a party that weekend and didn't have the time : ))
- ordered shower curtain from target.com (animal print was a MUST with my 7 & 9 and year old girls : ))
- shopped the house for frames and accessories
- picked up my towel bar and toilet paper holder at Wal-Mart of all places and I LOVE them...installed myself
- installed new electric outlets and light switches


I still have a few things I want to add to it...some hooks that hold towels better, maybe something above the shower, couple pieces of trim, maybe a cheap counter top, and couple other little decorations. I love the results I did on such a small budget and I've got a couple of really happy little girls with this makeover...love to hear your thoughts and ideas! ; )
Monday, February 7, 2011
Get paid to fix your dryer


My kids went outside and played in the snow Saturday and when they came in we were trying to hurry up to get ready to take them to grandma's so we could celebrate our 10th Anniversary (YAY!)....so in the midst of trying to get my pretty on and putting the snow clothes in the laundry...my STINKIN' DRYER stopped spinning. With all the weekend events, I didn't have time to mess with it until this morning. I would normally call our home warranty company, spend the $55 service fee and wait for them to come on out....BUT I thought I'd give it a try first this time.
I began by Googling...."Kenmore dryer stopped spinning", then, "how to open a "Kenmore dryer".

I realized the belt was still intact and it was probably something to do with the idler pulley (I found that term on Google too, I didn't figure it out on my own ; )) So, then it turned to "how to replace the idler pulley on a Kenmore." I wasn't sure where it was, but I knew that search would tell me.

Idle pulley was in the back left corner under the drum (found thanks to a Chattanooga appliance man)
Turns out my idler pulley didn't need replaced it had just come undone. So, in the time of 2 Mickey Mouse Clubhouses, I just saved my $55 service and made this...
found under the drum of the dryer
But now it's time to get all over this....

Have you fixed something without your husband and by the help of Google? If not...hopefully you'll give your next fix-it problem a try before calling the handyman!
Tuesday, February 1, 2011
FURNITURE FACELIFT : : TV console
While on the hunt for a console to go under our TV this fall I ran into a dilemma...I could pay about $300 - $400 for something I liked all right that was very average quality or I could take matters into my own hands. I'm kinda a "take matters into my own hands" sort of girl. So that's what I did. I started a search on Craig's List and all our local thrift stores that carried furniture for exactly what I wanted that had the great quality I wanted, but couldn't afford. I was pretty flexible in looks, but I knew it had to have a place to hold out tv/stereo equipment, which ruled out many.
So here's what I found...


So here's what I found...

(Sorry for the extremely bad picture quality, it was from my phone and the store was SO cramped!)
Inside the middle doors, it had a shelf (for stereo equipment) and it was solid wood! It was $80 at Salvation Army, but I got to spin the wheel to get an extra percentage off...gotta love thrift stores! I got 25% off (among the many 10% and 5%) so I was thrilled!
I don't have pics of the process since it was pre-blogging days, but here are the steps I took when I got it home:
- Take off doors, apply wood filler in holes and sand entire piece
- Wipe down and prime
- Paint (black, in this case)
- Ordered hardware from ebay (cheapest place I found for what I wanted...paid about $1 per knob)
- Used cordless drill to make 2 holes in the back for the cords to go through

Have you been looking for that perfect piece of furniture? Maybe I can help jump start your idea process...let me know!
Sunday, January 30, 2011
TV WALLS : : from blah to voila!

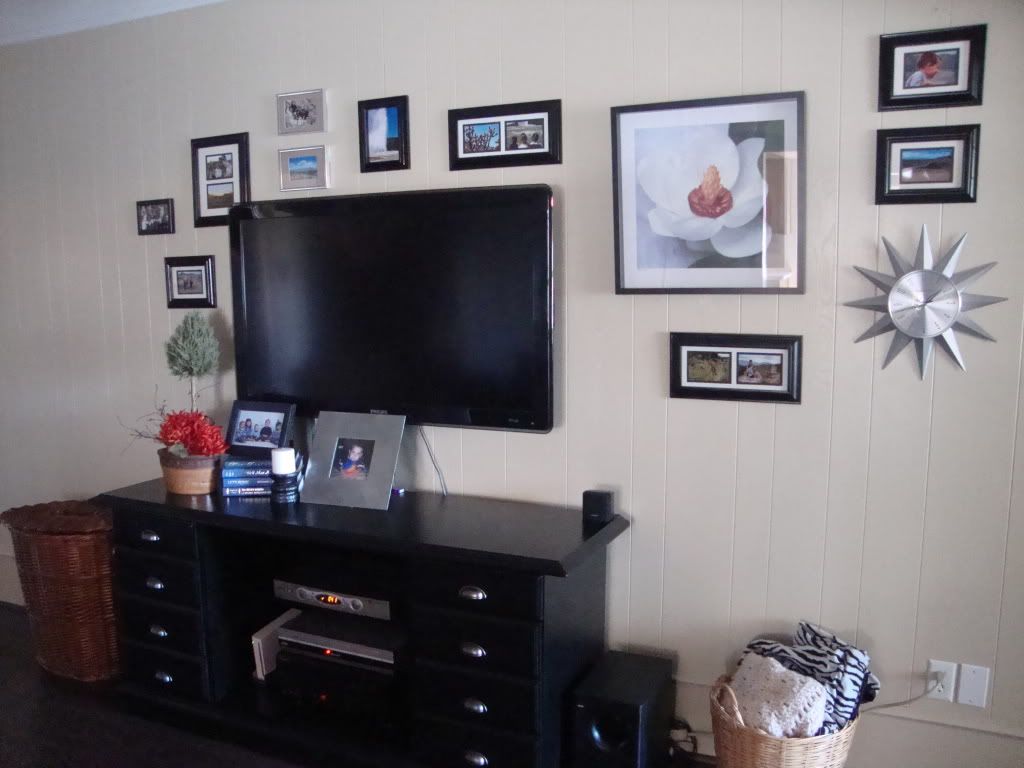
Does anyone else have a big ol' wall like this just waiting for something? Trying to figure out a game plan for what that "something" is can be quite daunting. So I just thought I'd throw out one idea, out of so many out there for you to think about and try. Here are the steps I took to tackle this project.
1. Figure out all my options and visual and research to help narrow down to one. In this case, I thought I could go with either a picture grouping on either side of the tv or one big gallery wall. I looked at pics of both and decided with the gallery wall to best unite the whole wall. My research also helped provide inspiration from other blogger/decorators: Emily A. Clark, Isabella and Max Rooms.
2. Next, I started gathering frames. I hit a sale at Salvation Army and got quite a few of these there for only $1 each. I just touched them all up with a bit of black spray paint and they were good to go. A couple I had just sitting around and the big one I got on the clearance rack at Ikea for $3. I also got a few packs of these Command 17204 Medium Picture Hanging Strips, 6-Sets
3. You know how some gallery walls just look ummmm....off? Well, since that wasn't the look I was exactly going for, I took the extra step and made cutouts for each piece I had to put up. I just taped up the pieces with masking tape. This way I didn't have to do all the visualizing in my head and I could make sure it all was going to look straight.

4. Last, I put in my pics and hung with a level. The only nail hole I made was for the large picture. I had a hard time deciding what to put in my pics...and whether to do color or black & white. I decided to take pics from our vacations and put them in....that allowed for some landscape shots and some with the family, but all tied together with a theme. I may change them to black & white but for now I am loving the colors and how they brighten up the room. (And no, I didn't paint in between shots...it's just the difference between flash shots and night and natural light shots!)

Sooo....for under $20 I have a wall that has some personality! I'd love to hear what you think about this mini transformation!
Subscribe to:
Posts (Atom)